I am taking this course as part of the Altenew Educator Certification Program. If you are interested in doing this class yourself, you can sign up for FREE here: https://altenew.com/collections/free-crafting-101-layering-classes/products/all-about-layering-class-bundle-1
Please note, I am not an affiliate and do not profit in any form if you click the product links I have included. I am just including them so you can recreate projects if you wish.
I decided to just go down the list in the way it was presented in the educator email, and started with All About Layering 3. This class is offered for free to everyone and I did not have to pay to take it, which is always nice.
I am going slowly through the classes and trying to do all the projects, even when they are techniques that I -think- I have already mastered. I am doing it like this to slow myself down and ensure that I get the absolute most of out the experience. I sometimes have a tendency to rush through things, and I don’t want to just make a project that looks like the example, I want to really learn.
That being said, this class does feel a little dated. It’s free and they still sell layered stamps, but the techniques have really advanced since the class was created, and have become even easier.
I did not want to use the Sweet Rose Bouquet set featured in the class- that is another thing I am trying with this process. I am not going to purchase supplies, I am going to use Altenew supplies from my stash. I’ve already found its really helping me look at my current supplies in a new light and understand why different elements are used in different projects.
They also use a cover die that I don’t own for one of the projects in this lesson. I looked in my stash for a similar die, and ended up going with one that would only cover the bottom half of my page.
The stamp set they used can be found here: https://altenew.com/products/sweet-rose-bouquet?variant=41241492160569
The die can be found here: https://altenew.com/products/leaf-frame-cover-die
The first project looked like this from the class:

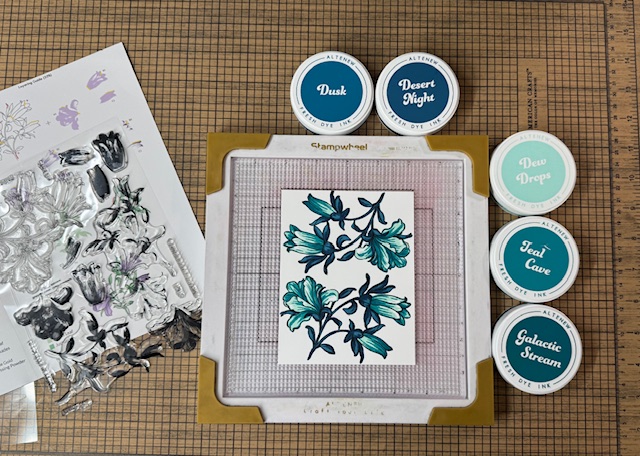
For my project, I used the Giant Bellflower build a flower set and the peeking leaves cover die.
I also wanted to do a non-traditional color scheme and purposely avoided pinks and purples- I used Dusk, Dew Drops, and Galactic Stream as my primary colors. I have been on a kick of using blue instead of greens for leaves lately too!

The class was filmed before the stampwheel, and I will say the stamp wheel made the class MUCH easier.
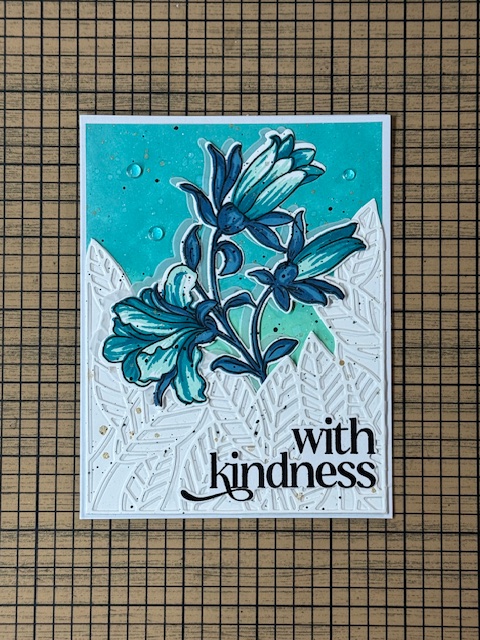
I followed the techniques in the class, layering the stamps with different colors. Again, the stamp wheel made it VERY easy to get clean, beautifully stamped images.
When the stamping was done, I layered vellum and a couple layers of white cardstock with the leaves die on top of a card front I ink blended with the same colors I had used to stamp the images. I die cut my floral image, and glued it all down. Then, I added splatter to finish the card off.
My finished product for this lesson:
Key takeaways from this lesson:
-The stampwheel is amazing!
-Take a few extra seconds to be extra careful when lining up layered stamps
-I would not have thought to add the vellum layer if I had not carefully and slowly done the class
-I need to start adding more vellum to projects!
Thank you for joining me for lesson one, and I hope you try this free class yourself!

Leave a comment