By The Sunshine Stamper
🌸 Welcome to the Garden!
If you’ve ever sat down to craft and felt overwhelmed by choices, papers, inks, stamps, dies, embellishments you’re not alone! Many papercrafters struggle to balance inspiration with organization.
The Garden Method of Paper Crafting is my favorite way to bring both joy and flow back into the creative process. Think of your craft space as a little garden: full of ideas waiting to bloom, tools ready to grow something beautiful, and moments of calm in between.
This method helps you plan, prep, and complete your projects more efficiently while keeping your creativity fresh and fun!
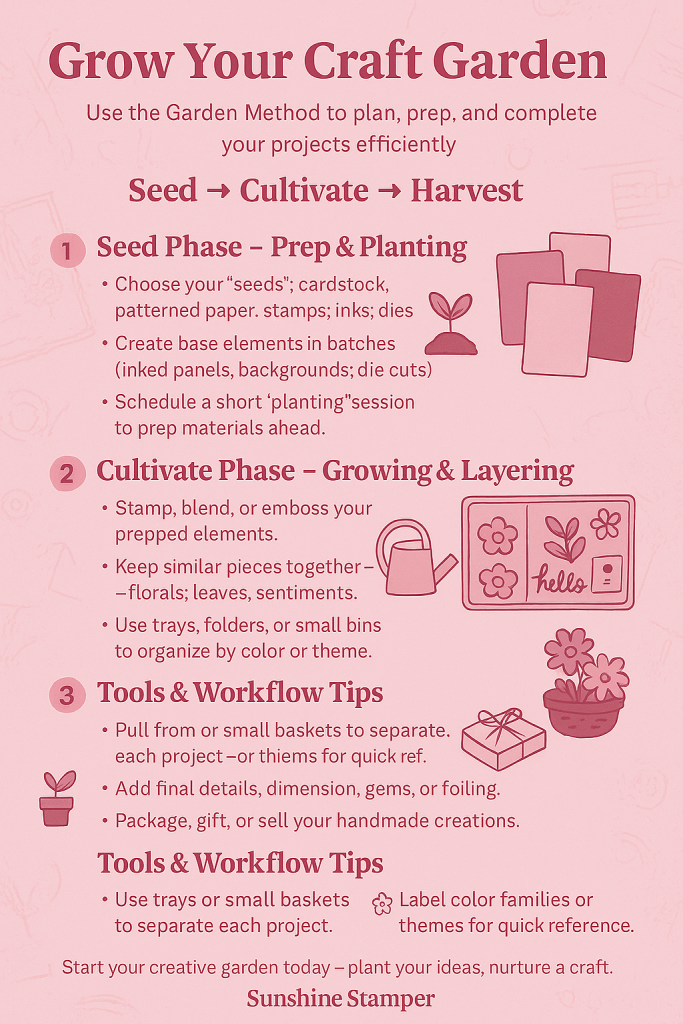
🌱 Phase 1- Seedlings: Prep & Planting
Every beautiful card starts with a seed of inspiration. In this phase, you’re gathering your raw materials- cardstock, patterned papers, inks, and stamps and preparing them so they’re ready when creativity strikes.
🪴 What You’ll Do
- Choose your “seeds”: cardstock, patterned paper, stamps, inks, and dies.
- Create base elements in batches (inked panels, die cuts, backgrounds).
- Schedule a short “planting” session, just 20 minutes of prep can yield hours of creative freedom later.
🎨 Why It Works
Batch-creating backgrounds and die cuts is like planting a row of seeds. You’ll have everything prepped and ready to “bloom” when inspiration blossoms. This method removes decision fatigue and makes your craft time more playful and productive.
💡 Pro tip: Store your “seeds” in clear envelopes or small baskets labeled by color family or collection. It’s like organizing a flower bed, each hue gets its own little section!
🌼 Phase 2- Cultivate: Growing & Layering
This is where your creativity flourishes. The cultivation phase is about giving those seeds attention by adding color, texture, and dimension to bring your paper garden to life.
🌿 What You’ll Do
- Stamp, blend, or emboss your prepped elements.
- Add ink blending, splatter, or heat-embossed details.
- Keep similar pieces together: florals with florals, leaves with leaves, sentiments in their own group.
🧺 Organization Tip
Use trays, folders, or small bins to separate projects by color theme or occasion. A divided tray makes it easy to “harvest” your elements later when you’re assembling.
🌷 Creativity Tip
Try blending unexpected color palettes! A coral flower next to a teal leaf may sound daring but just like a garden, the most surprising combinations often turn out the most beautiful.
🌸 Remember: You’re not just making pieces, you’re nurturing potential. Give yourself permission to play, layer, and experiment.
🌻 Phase 3- Harvest: Assembly & Finishing
Now comes the most rewarding part- gathering your finished pieces and turning them into completed works of art!
🌺 What You’ll Do
- Pull from your “garden” of prepped elements to assemble cards, tags, or journal layouts.
- Add dimension, gems, foiling, or stitching for extra polish.
- Package, gift, or sell your handmade creations.
🧵 Why It Feels Magical
When you reach this phase, your creative work flows effortlessly. You’re not scrambling for supplies you’re simply harvesting what’s already grown. Whether you’re finishing a birthday card or a handmade tag, the satisfaction is instant and joyful.
🌼 Bonus tip: Keep a “Ready to Harvest” basket near your workspace. Drop in finished flowers, sentiments, and backgrounds that didn’t make it onto a card and they’ll be perfect for future projects.
✂️ Tools & Workflow Tips
- 🪴 Use trays or small baskets to separate each project.
- 🌼 Label color families or themes for quick reference.
- 📸 Take photos of tray layouts to recreate successful designs later.
- ⏰ Work in short creative bursts of 15 to 30 minutes per phase.
- 📅 Batch tasks: one night backgrounds, next day stamping, later assembly.
💌 Why the Garden Method Works for Modern Crafters
Life gets busy, but creativity doesn’t have to take a back seat. The Garden Method helps you:
- Simplify your workflow.
- Build momentum even when you have limited time.
- Reduce clutter and burnout.
- Keep inspiration fresh by revisiting your “garden” of prepped materials.
🌞 When creativity feels like a chore, it’s time to garden. The Garden Method reminds us that crafting isn’t about rushing, it’s about growing something beautiful one step at a time.
🛍️ How to Use the Garden Method for Selling Handmade Crafts
If you sell handmade cards, journals, or stationery, this method is a game-changer! Batching your process helps you maintain consistency and create cohesive collections efficiently.
- Design by theme: Sunshine Blooms, Winter Whispers, or Cozy Cottage.
- Prep in advance for seasonal craft fairs and online launches.
- Tell the “garden story” of your creations to connect with buyers.
🌸 A Garden Grows Best When Shared
The best part of crafting is connection. Share your Garden Method projects on social media using #GardenMethodCrafting and #SunshineStamper. Show off your trays, layers, and finished blooms and encourage friends to grow their own creative gardens!
🌷 Ready to Start Growing?
Set aside one hour this week to begin. Gather your supplies, pick a few stamp sets, and plant your creative seeds. Remember, your crafting journey isn’t about perfection; it’s about process. Watch your creativity bloom through preparation, play, and completion.
🌼 Plant. Nurture. Harvest. Create.
That’s the beauty of the Garden Method.
📸 Visual Inspiration
🌷 Infographic Reference

As your creative garden grows, so does your confidence. You’ll start each craft session knowing exactly where to begin and end every one feeling fulfilled. Now go plant some paper blooms- your next masterpiece is waiting to sprout!
🌸
© The Sunshine Stamper | Inspired by the Garden Method of Paper Crafting

Leave a comment