
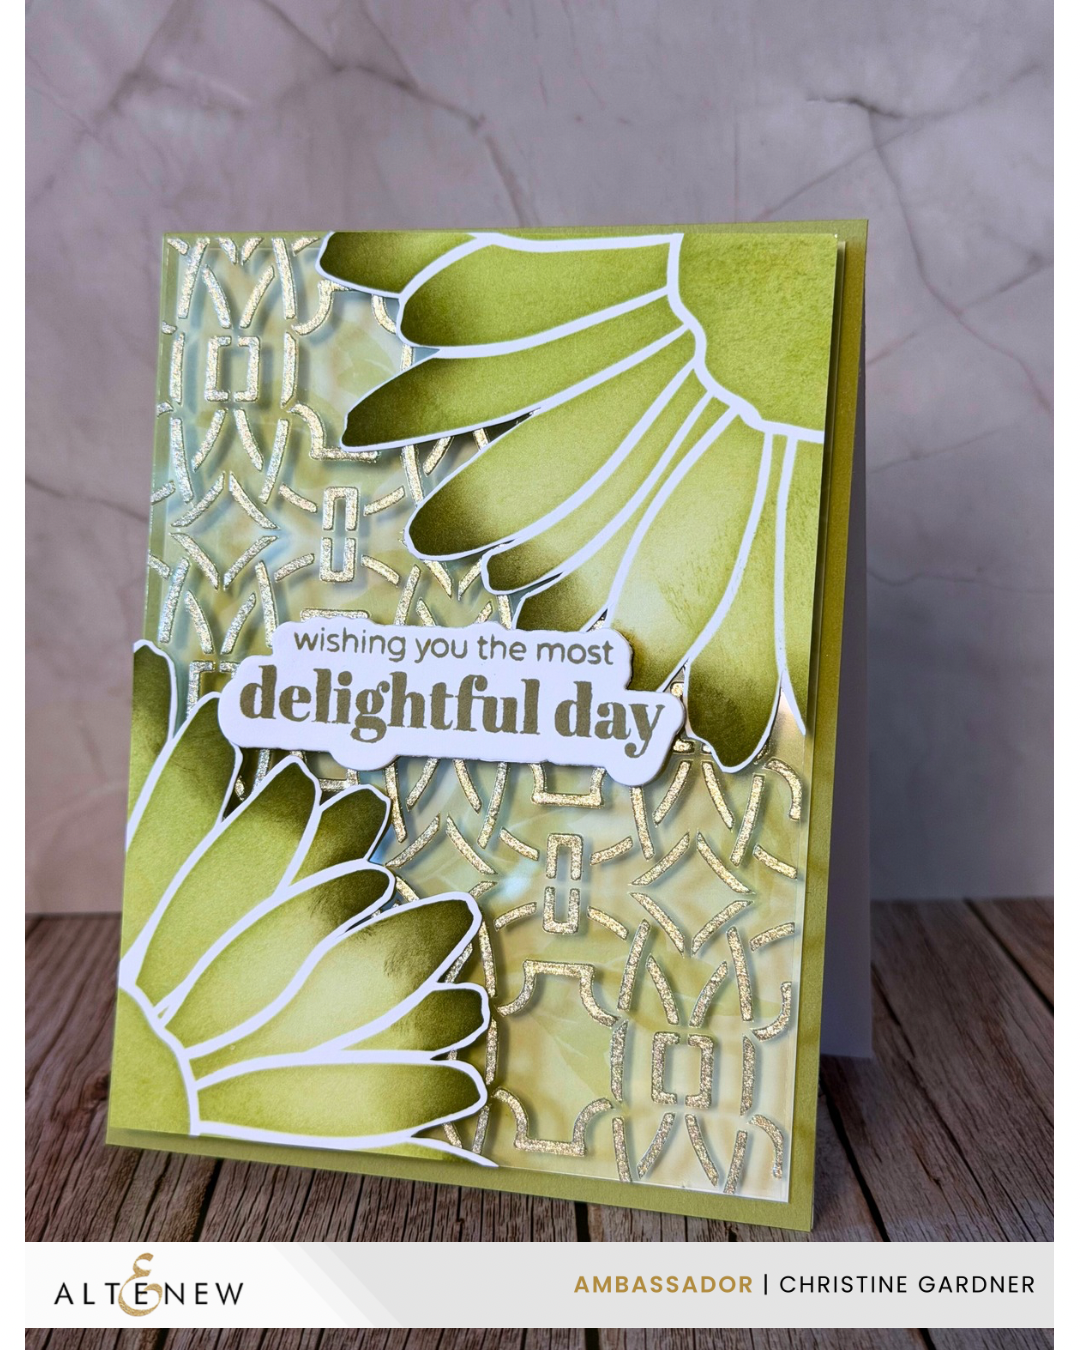

There is something about a rich, moody green that just stops you in your tracks. No four-leaf clover needed , this card is lucky all on its own. I have been completely obsessed with this color palette, and today I am walking you through every layer of how this card came together using some of my favorite Altenew products.
As an Altenew Ambassador, working with these products never gets old. This card uses three distinct layers, and each one brings something special to the final look.
Layer One: The Background
Every great card starts with a strong foundation. I began with ink blended greens using the Forest Trail Fresh Dye Ink Family from Altenew. This color family has four beautifully graduated greens that blend together like a dream, giving you depth and dimension that makes a background feel alive rather than flat.
Once the ink was blended out, I added a soft background texture using a stamp from the Leafscape Stamp Set. The softness of that background impression keeps things subtle. It adds interest without competing with the layers on top.
Layer Two: The Oversized Flower
This is the layer that makes the whole card. I used the Petal Pop Stencil and inked it up using those same gorgeous Forest Trail greens. The oversized daisy design fills the card front beautifully, with the petals radiating out from the corner for a dramatic, modern look.
The color shift across the petals as the inks blend from light to dark is what makes this layer so stunning. It is the same ink family as the background, so everything stays cohesive, but the stencil creates enough contrast to make the flower pop. No coloring required , just a blending brush and the right inks.
Layer Three: The Acetate Overlay
This is the layer everyone asks about, and it is simpler than it looks. I used Brushed Pyrite Shimmer Relief Paste applied through the Luxe Lattice Stencil onto a piece of acetate. Once dry, that acetate layer sits on top of the card and creates a gorgeous, glittery geometric overlay that catches the light beautifully.
Brushed Pyrite has that warm, slightly golden glitter that reads as both earthy and luxurious. On acetate, it is translucent enough that you can see everything beneath it, but it adds a whole new dimension of sparkle and texture that elevates the entire card.
Tip: Let the paste dry completely before handling the acetate panel. Even though the formula dries relatively quickly, acetate can take a little longer than paper. Patience is worth it.
Supplies Used
Affiliate links are used below. When you shop through my links, I earn a small commission at no extra cost to you. Thank you so much for your support!
Forest Trail Fresh Dye Ink Family
Leafscape Stamp Set
Petal Pop Stencil
Shimmer Relief Paste in Brushed Pyrite
Luxe Lattice Stencil
Shimmer Relief Paste Bundle (all 7 colors)
Three layers. One stunning card. Whether you are making this for St. Patrick’s Day or just because you love a gorgeous green, I hope it inspires you to pull out those Forest Trail inks and get creating. If you make your own version, tag me , I would love to see it!


Leave a Reply